Everyday Makeup Tutorial: Brows to Lips for Beginners
Natural-looking makeup is less about buying more products and more about pressure, placement, and knowing when to stop. This beginner tutorial works one feature at a time—brows, eyes, cheeks, and lips—then brings the whole face back into balance.
Free download: Get the companion PDF + PPTX chapter — subscribe by email for the full series.
 A finished look built one feature at a time.
The six-move everyday makeup order
- Frame the brows.
- Add soft depth to the eyes.
- Define the lash line and lashes.
- Bring color to the cheeks.
- Prep, shape, and color the lips.
- Step back and check the balance.
The order is flexible. What matters is checking the whole face before adding another layer.
 One move at a time, then check the whole face.
Step 1: Frame natural brows—do not redraw them
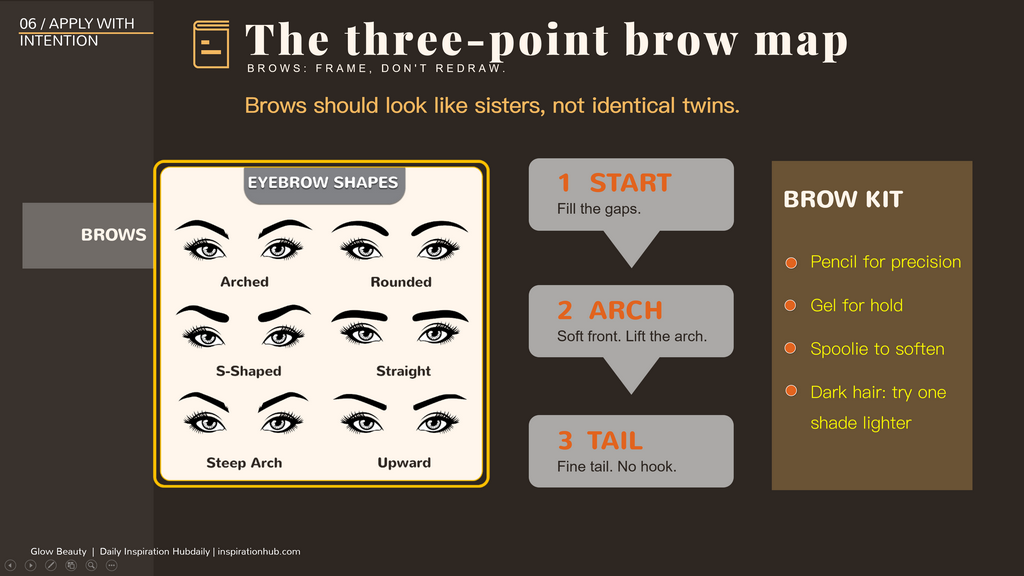
Use a spoolie to brush hairs into place, then map three points: the start, arch, and tail. With a fine pencil, fill only visible gaps using light, hair-like strokes. Keep the brow front soft, add slightly more definition through the arch, and taper the tail. Brush through once more and use a small amount of gel if needed.
The easiest brow product is one you can control. A shade close to—or slightly lighter than—your hair often looks softer than a very dark pencil.
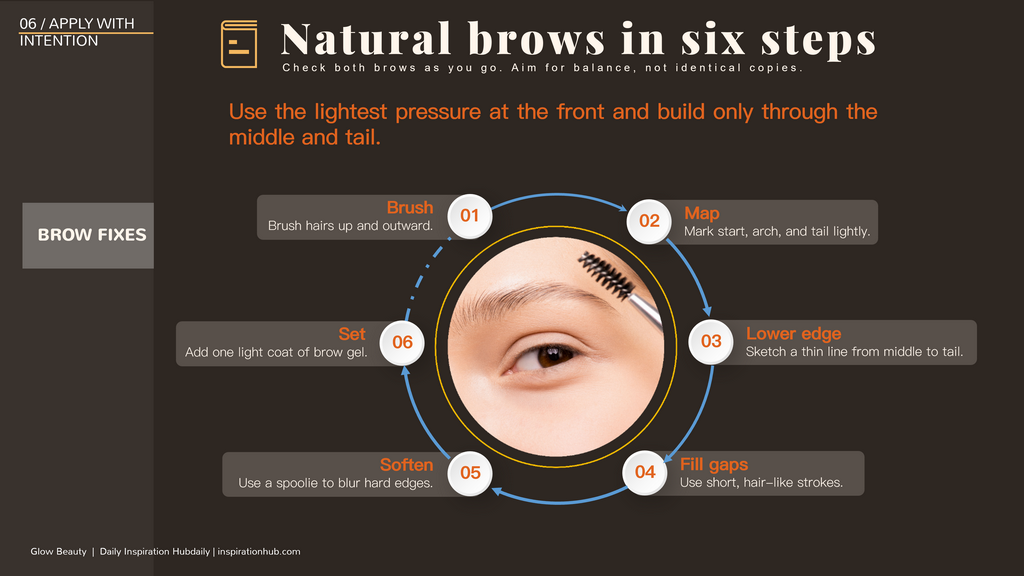 Start, arch, tail: map three points, then fill only the gaps.
Avoid the “drawn-on” look
- Do not create a square, dark inner brow.
- Avoid pressing equally hard from start to tail.
- Keep the tail fine and prevent it from hooking downward.
- Compare both brows from arm’s length; aim for balance, not identical copies.
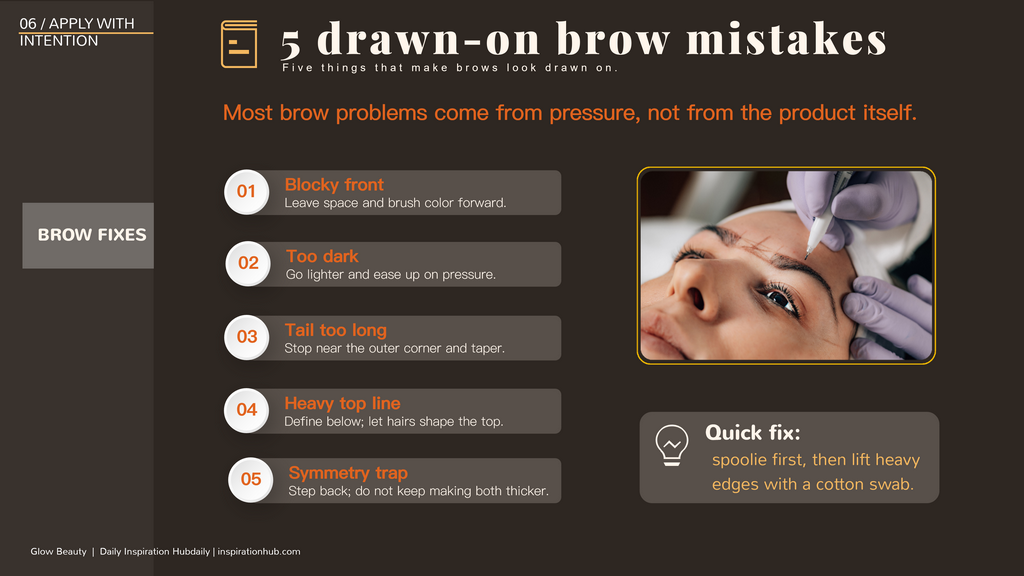 Soft front, defined arch, tapered tail.
Step 2: Build soft eyeshadow from light to deep
A simple four-shade palette is enough: a light base, a mid-tone transition, a deeper shade, and an optional highlight.
- Blot excess oil from the lids.
- Sweep the light shade over the lid.
- Blend the mid-tone through the crease.
- Place the deeper shade at the outer corner or lash line.
- Use a clean brush to soften every edge.
- Stop while the light, mid, and deep zones are still visible.
Pick up less shadow than you think. It is easier to add color than to rescue a muddy patch.
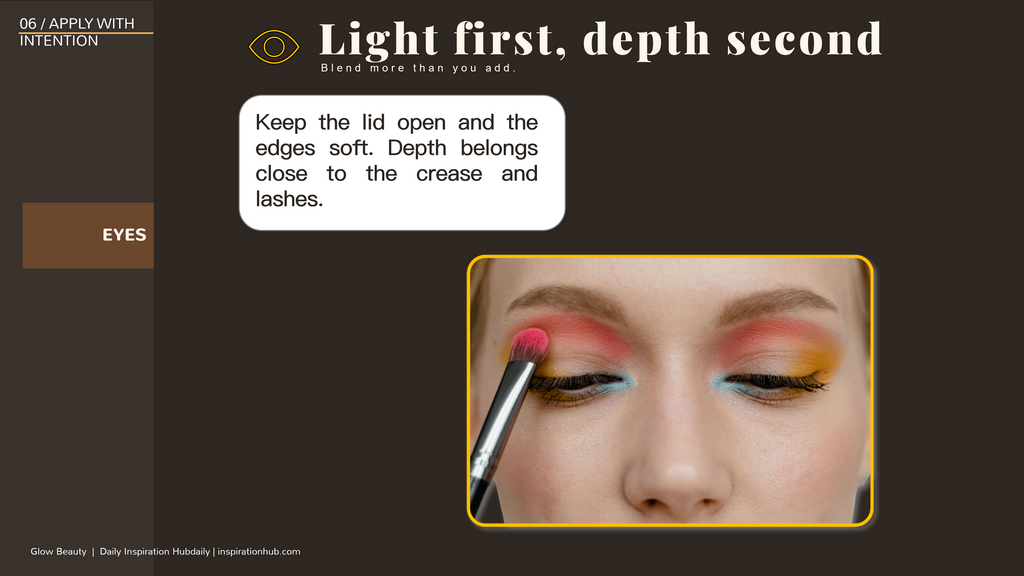 Light, mid, deep, highlight—blend the edges, not the colors into one.
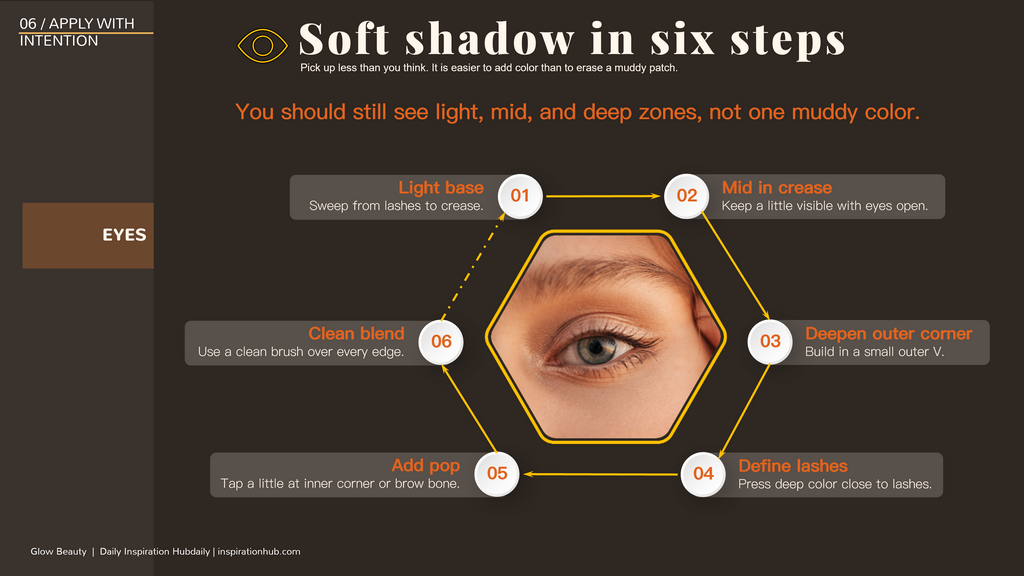 Stop while the zones are still visible.
Step 3: Keep liner close and mascara clean
For the most wearable result, keep eyeliner close to the lash roots. Pencil is usually easiest to control; liquid gives a sharper line. Work in short strokes and correct with a cotton swab instead of thickening the entire line.
Curl lashes before mascara. Start the wand at the roots, wiggle lightly, and pull upward. Separate clumps while the formula is still workable. Never share eye makeup, and stop using any product that irritates the eye area.
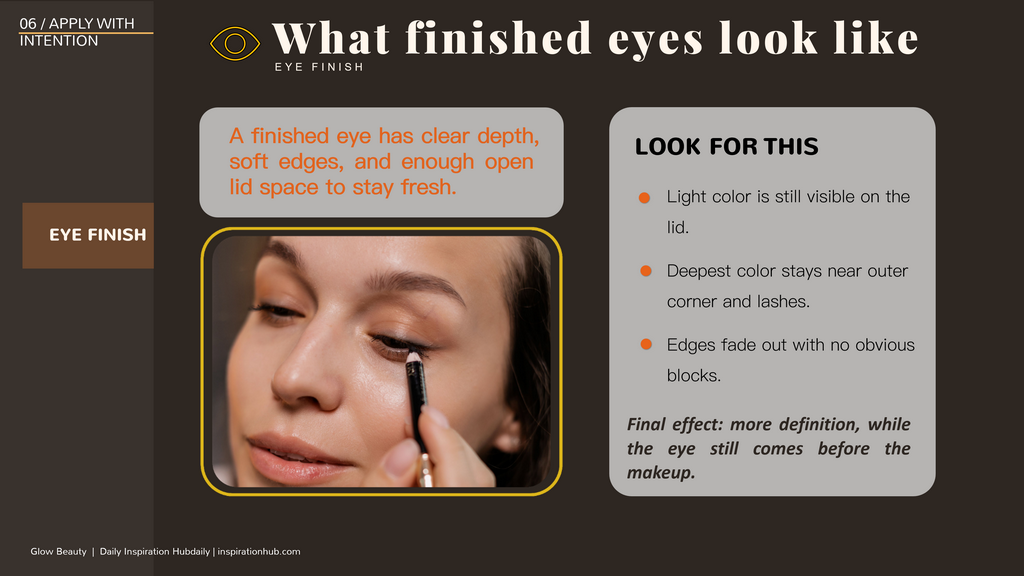 Liner at the roots, lashes separated, no clumps.
Step 4: Choose blush placement by the mood you want
Start with a very small amount. Cream blush can be tapped on with fingers or a sponge before powder; powder blush works best with a soft brush after excess product is tapped off.
- Fresh and centered: place color on the apples and diffuse the edge.
- Lifted: place color higher on the cheekbones and blend toward the temples.
- Soft sculpt: keep color slightly back and blend upward.
- Sun-kissed: connect a light wash across the high cheeks and nose.
Keep the placement above the nostril line so the face does not look pulled down.
 Above the nostril line, blended upward.
Step 5: Prep lips, then build color from the center
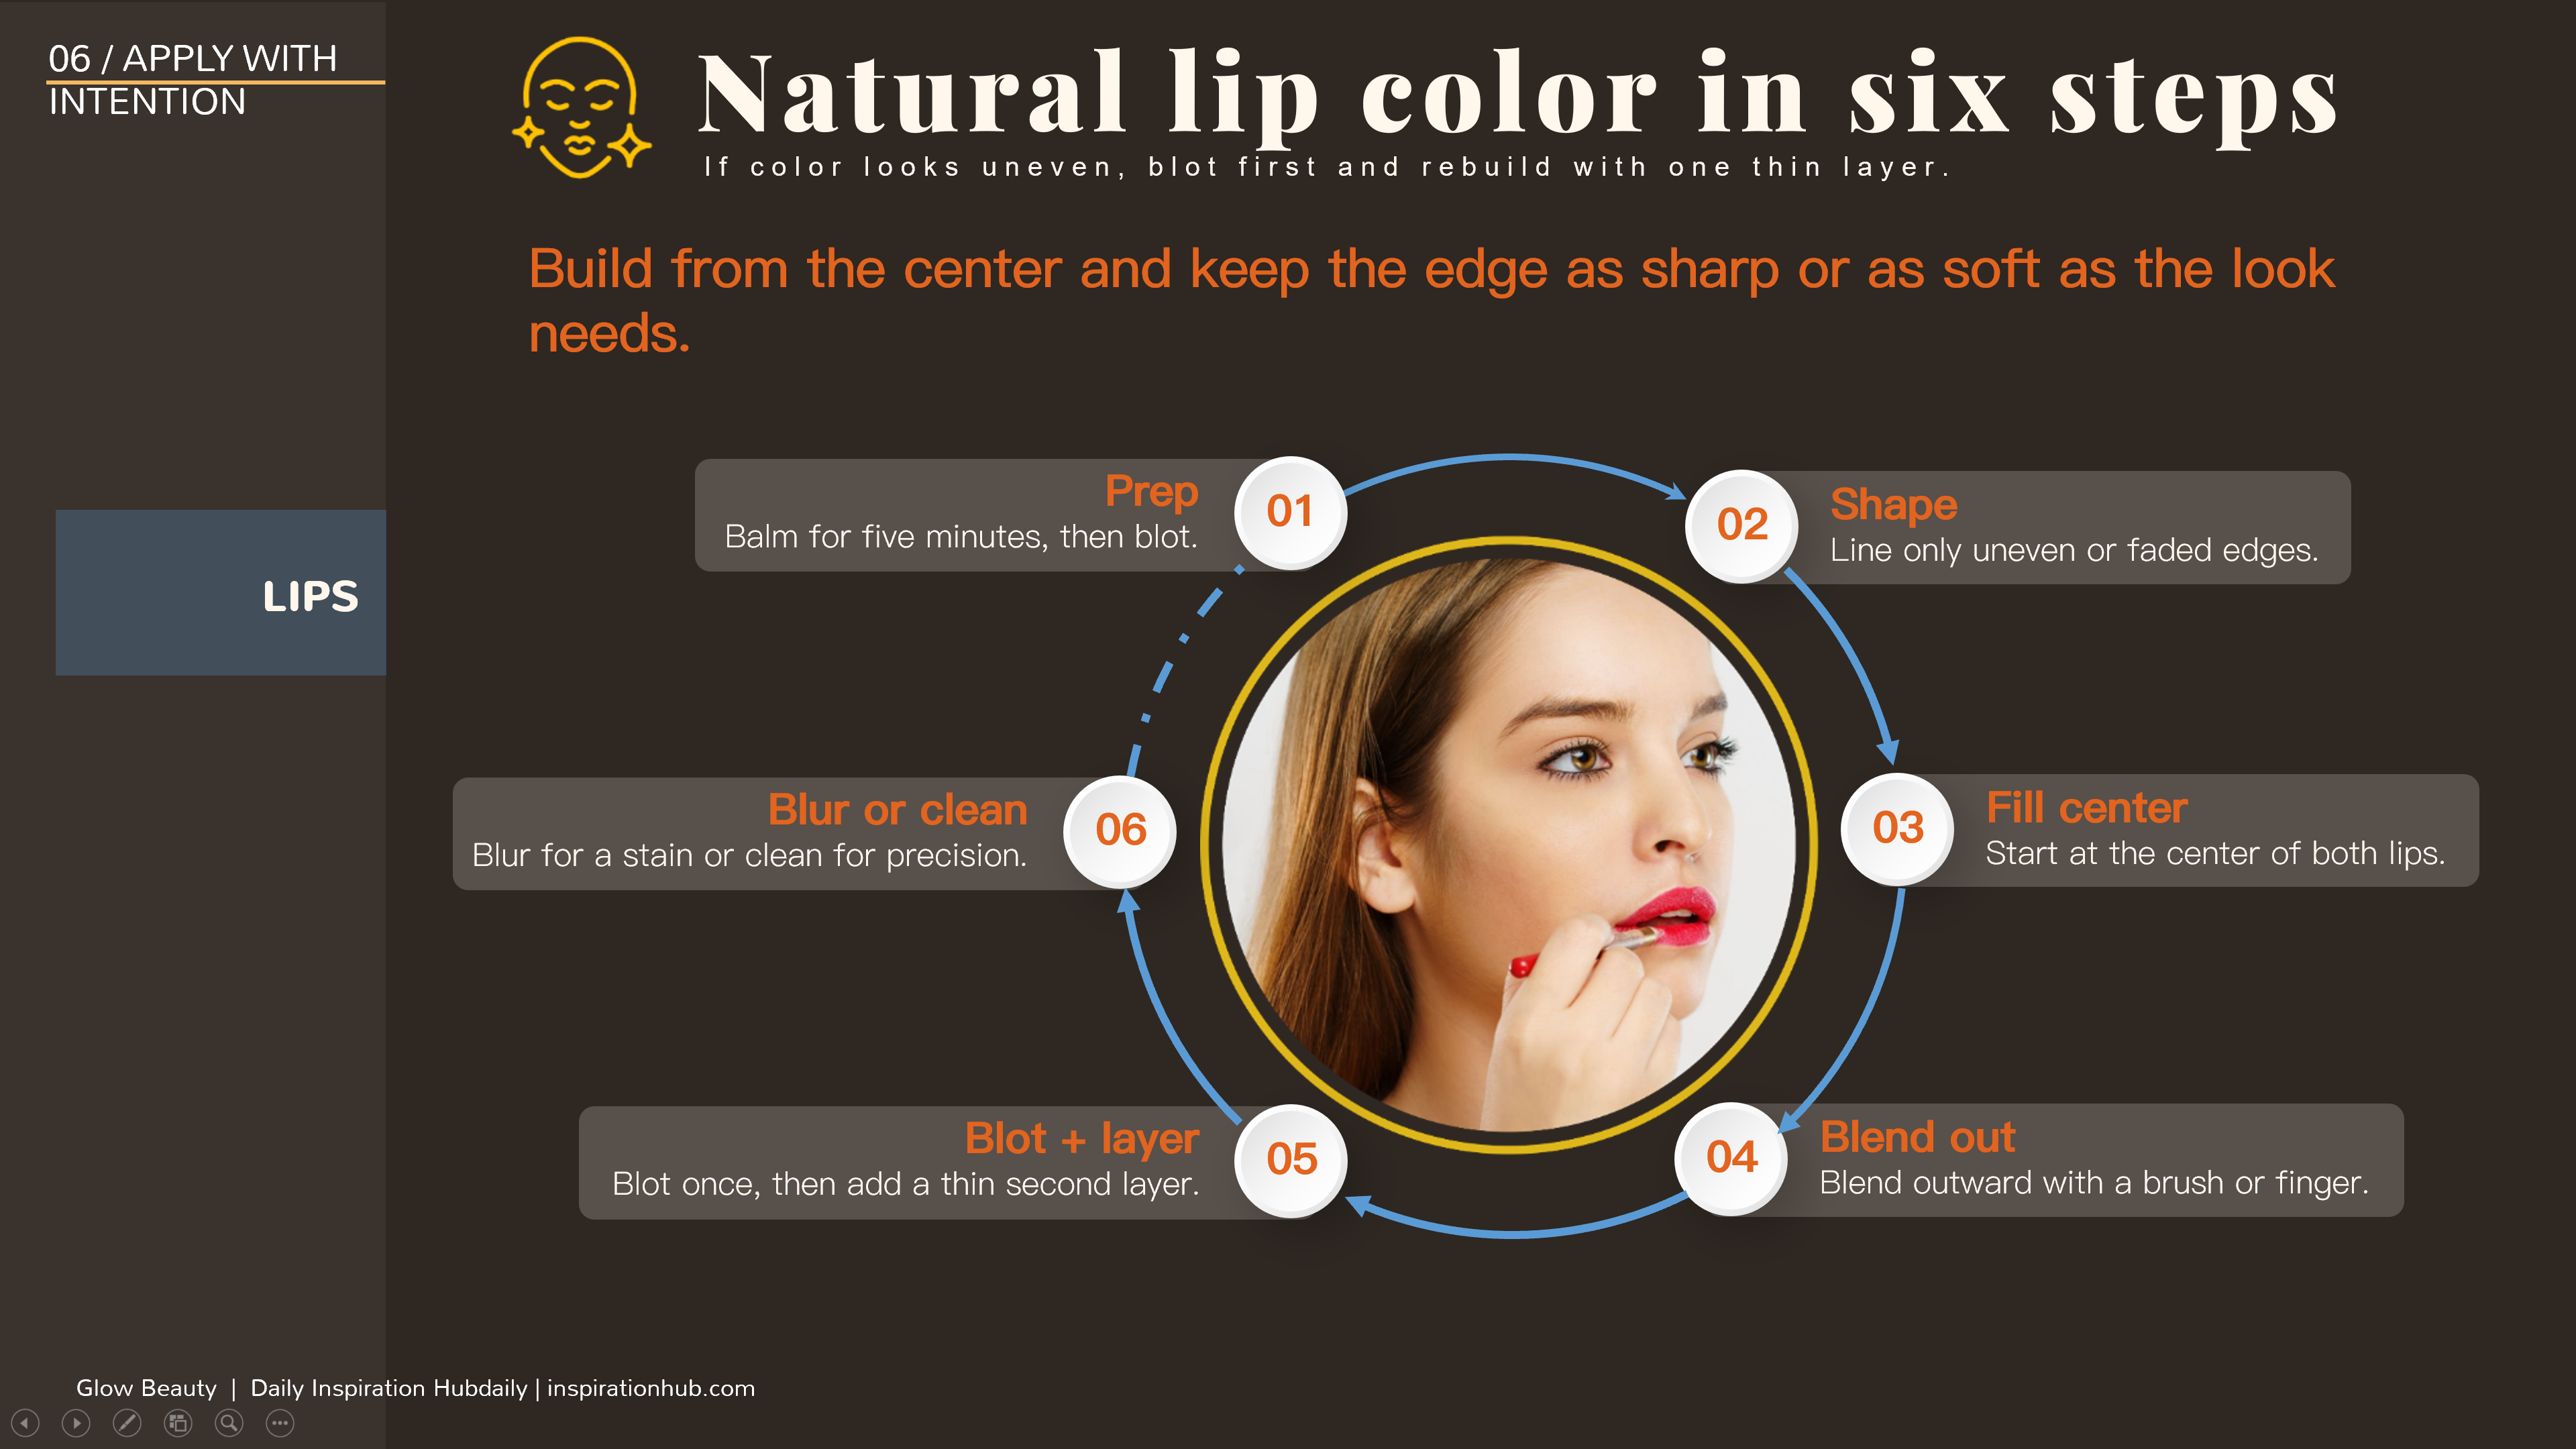
Apply balm for about five minutes, then blot away extra slip. Line only uneven or faded edges if you want more definition. Apply lip color at the center, blend outward, blot once, and add one thin second layer. For a soft stain, blur the edge; for a polished lip, clean the edge.
If the color looks uneven, blot first rather than adding a heavy layer on top.
 Center first, blend outward, blot, repeat thin.
Step 6: Make the colors speak the same language
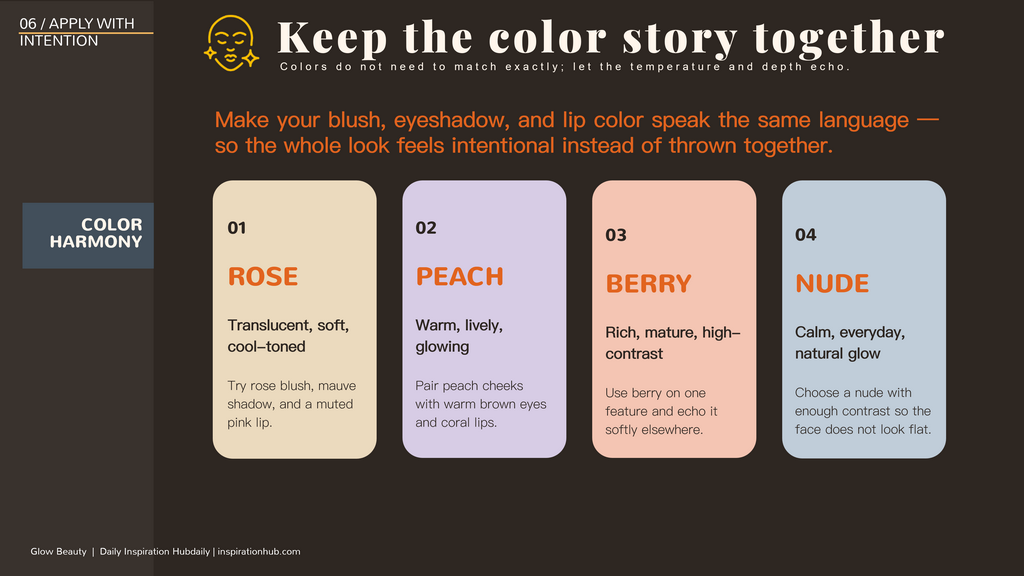
Your blush, eyeshadow, and lip color do not need to match exactly. Let their temperature and depth echo:
- Rose: rose blush, mauve shadow, muted pink lip.
- Peach: peach cheeks, warm brown eyes, coral lip.
- Berry: let one rich berry feature lead and echo it softly elsewhere.
- Nude: choose enough contrast to keep the face from looking flat.
 Pick a family, then vary depth and finish inside it.
The final 10%: step back before adding more
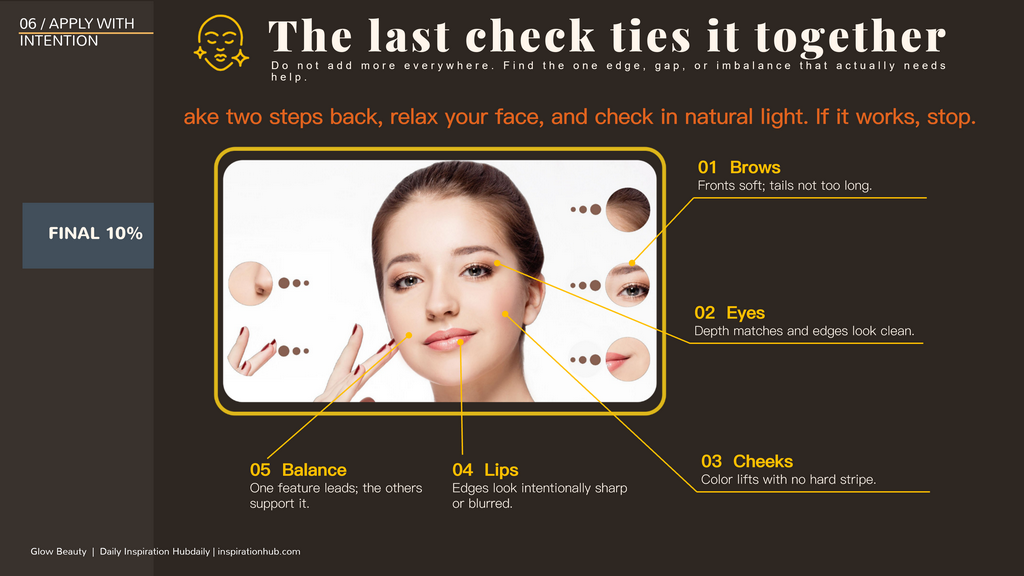
Check the face in natural light from two steps away. Are the brow fronts soft? Do both eyes have similar depth? Does blush lift rather than form a stripe? Are the lip edges intentionally sharp or blurred? Let one feature lead and allow the others to support it.
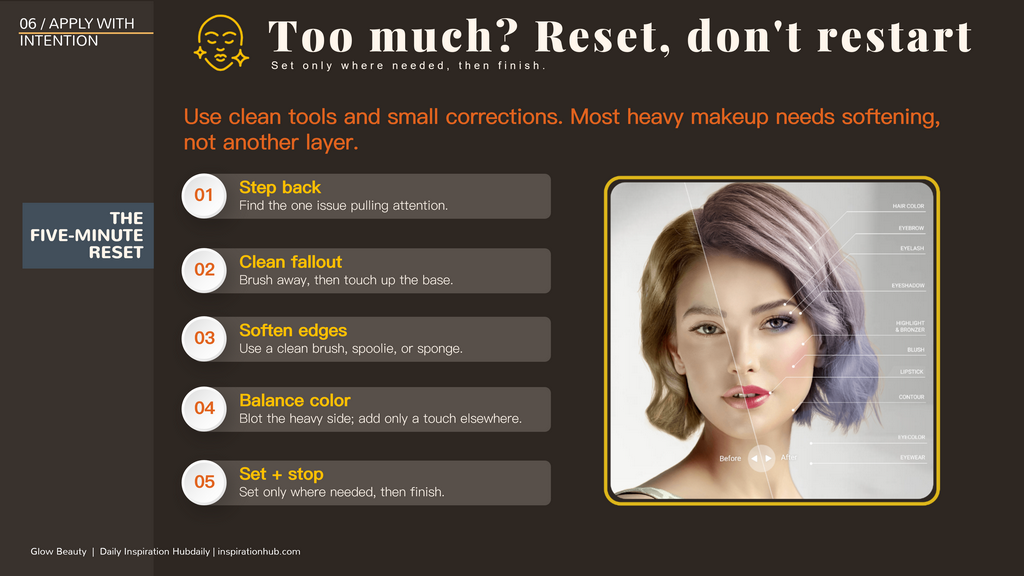
If something feels heavy, reset instead of restarting: blot excess, clean fallout, soften one edge with a clean tool, rebalance color, set only where needed, and stop.
 One feature leads; the rest support it.
Get the free chapter PDF + PPTX:
Previous: Part 1 — Skin Prep for Everyday Makeup Next: Part 3 — How to Remove Makeup Gently to take it all off without scrubbing.
Safety note
Keep hands and tools clean. Do not share mascara or eye products. Stop using a product if irritation develops, and seek appropriate professional care for persistent eye symptoms.
Source
- U.S. Food and Drug Administration, Eye cosmetic safety
Get the Beginner Makeup Routine PDF
A 24-page printable guide: the exact steps, the full product list, and a mirror checklist. Free when you join the list.
- A simple, no-pressure routine anyone can follow
- A drugstore-friendly product list (no guesswork)
- Printable A4 / Letter — keep it right by the mirror
New here? See how email subscription works →